An oven door that won’t close flat is more than an annoyance. It can cause uneven baking, longer preheat times, extra heat in your kitchen, and in some cases it can affect how safely your oven operates (especially during high-heat cycles). The good news is that many “crooked” or “droopy” oven doors come down to a handful of fixable issues: worn hinges, a spring or hinge receiver problem, or a door that was reinstalled slightly out of position after cleaning.
This guide walks you through safe, practical checks and the most common hinges, springs, and alignment steps homeowners can do before booking oven repair in Phoenix.
Quick diagnosis: What your oven door symptoms usually mean
Use this table to narrow the cause before you remove anything.
| Symptom | Most likely cause | What to check first |
|---|---|---|
| Door looks “tilted” or has an uneven gap left vs right | One hinge not fully seated, hinge receiver shifted, or one hinge worn | Hinge seating in the slots, hinge receiver screws, hinge arm shape |
| Door drops suddenly when opened | Worn hinge mechanism or hinge spring tension issue (design-dependent) | Hinge play, hinge lock position, loose mounting points |
| Door won’t close all the way, but hinges look fine | Obstruction, warped door, damaged latch area, or gasket/seal issue | Door corners for debris, latch alignment, gasket condition |
| Door pops open slightly during baking | Weak hinge tension or misalignment; sometimes gasket isn’t sealing | Hinge tension and seating; then inspect gasket |
| Grinding, clicking, or metal-on-metal sound at the hinge | Bent hinge, loose receiver, or damaged hinge channel | Tighten hardware; inspect for damage before continued use |
If you suspect the issue is heat leaking around the perimeter (instead of a sagging door), you may be dealing with the gasket. This guide focuses on hinges and alignment, and you can also reference this related walkthrough: How to Repair an Oven Door Seal in Phoenix – Stop Heat Leaks Fast.
Safety first (especially with springs and heavy doors)
Oven doors are heavier than they look, and hinge systems store tension. Before you start:
- Turn the oven off and let it cool completely.
- Shut off power at the breaker for electric ovens. For gas ovens, turn off power as well (most have electrical components even if they heat with gas).
- Remove racks so you can work without snagging.
- Wear work gloves (sheet metal edges can be sharp).
- Plan for the door’s weight. If you have a wall oven, consider having a second person help.
If you smell gas at any time, stop and follow gas leak safety guidance from the American Gas Association or your utility’s instructions, then contact a qualified professional.
Tools and supplies you’ll commonly need
Most hinge and alignment work is basic hand-tool territory.
- Phillips and flathead screwdrivers
- Nut driver or socket set (common sizes vary by model)
- Work gloves
- Flashlight or headlamp
- A towel or cardboard to protect the floor
- A small container for screws
- Your oven’s model number (usually on the frame behind the door or inside the storage drawer)
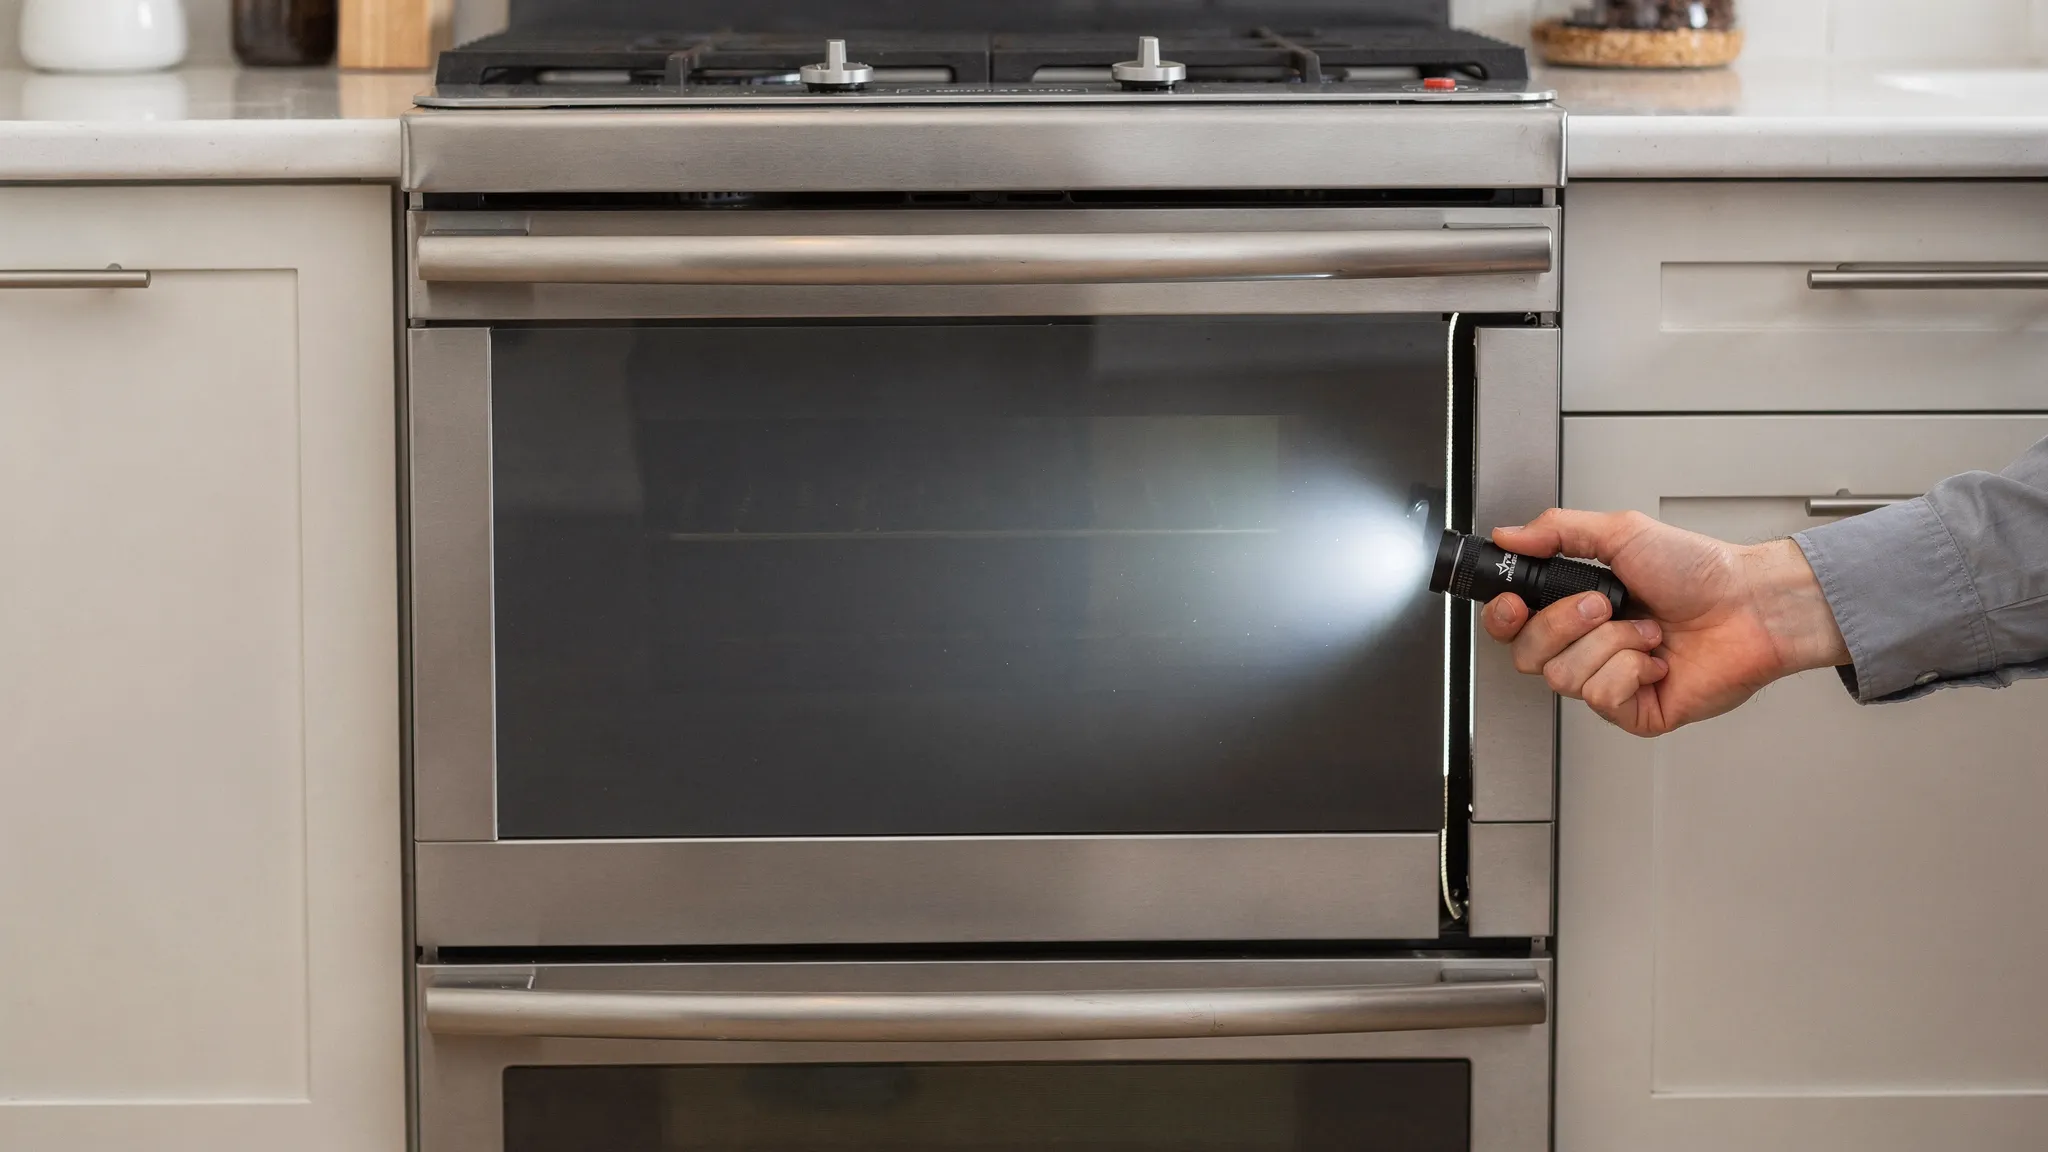
Step 1: Confirm it’s a hinge or alignment issue (not something simpler)
Before removing the door, do these quick checks.
Check for obstructions and loose hardware
Open the door and look for anything blocking full closure:
- Foil or food debris stuck along the bottom lip
- A warped or out-of-place bottom trim piece
- Loose door handle screws that let the door skin shift
Gently tighten any obviously loose screws on the door handle and inner door frame (do not overtighten into thin sheet metal).
Compare left and right hinge behavior
With the door open about halfway:
- Does one side feel “looser” or drop lower?
- Does the door bind on one side when closing?
If one side behaves differently, the hinges are not sharing the load evenly. That usually points to a worn hinge, a hinge not seated correctly, or a shifted receiver bracket.
Look for hinge seating problems
Many ovens use hinge arms that slide into slots (receivers) in the oven frame. If the door was removed and reinstalled recently (for cleaning, moving, or gasket work), one hinge can sit slightly out of position.
A common clue is a door that looks fine when fully closed but “twists” as it opens or closes.
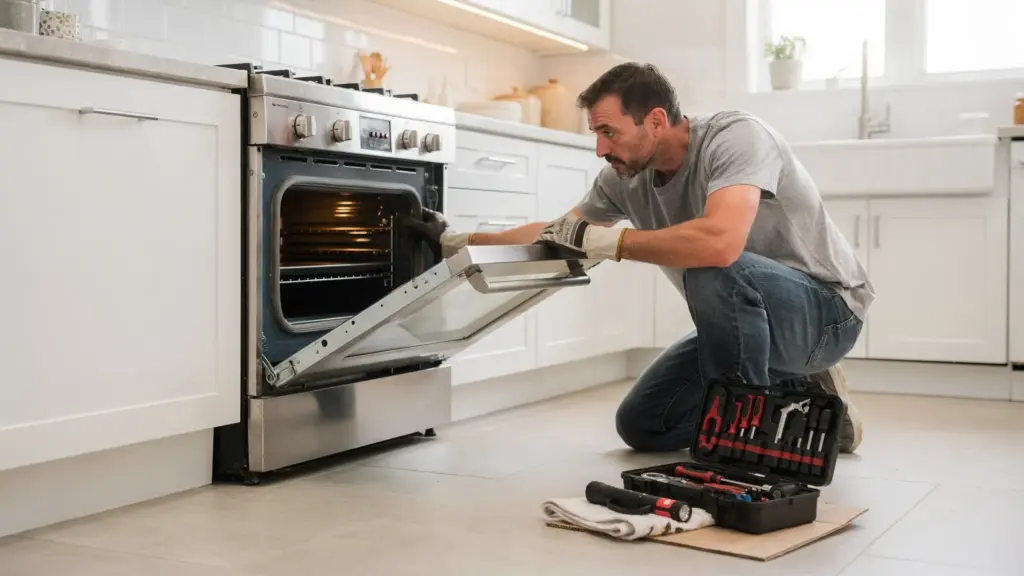
Step 2: Remove the oven door safely (general method)
Exact steps vary by brand, so check your owner’s manual for your model. That said, many freestanding ranges and wall ovens use a hinge-lock design.
- Open the oven door fully.
- Locate the hinge locks near the hinge arms (often small flip tabs).
- Flip the hinge locks toward you (or down, depending on design) to the locked position.
- Close the door slowly until it stops partway open (often around 10 to 30 degrees). This is the “broil stop” position on many models.
- Firmly grasp both sides of the door.
- Lift up and pull the door away from the oven frame.
- Set the door on a protected surface with the handle side down or as the manual recommends.
If the hinge locks will not move, do not force them. Forcing can bend the hinge mechanism. This is a good point to call a technician.
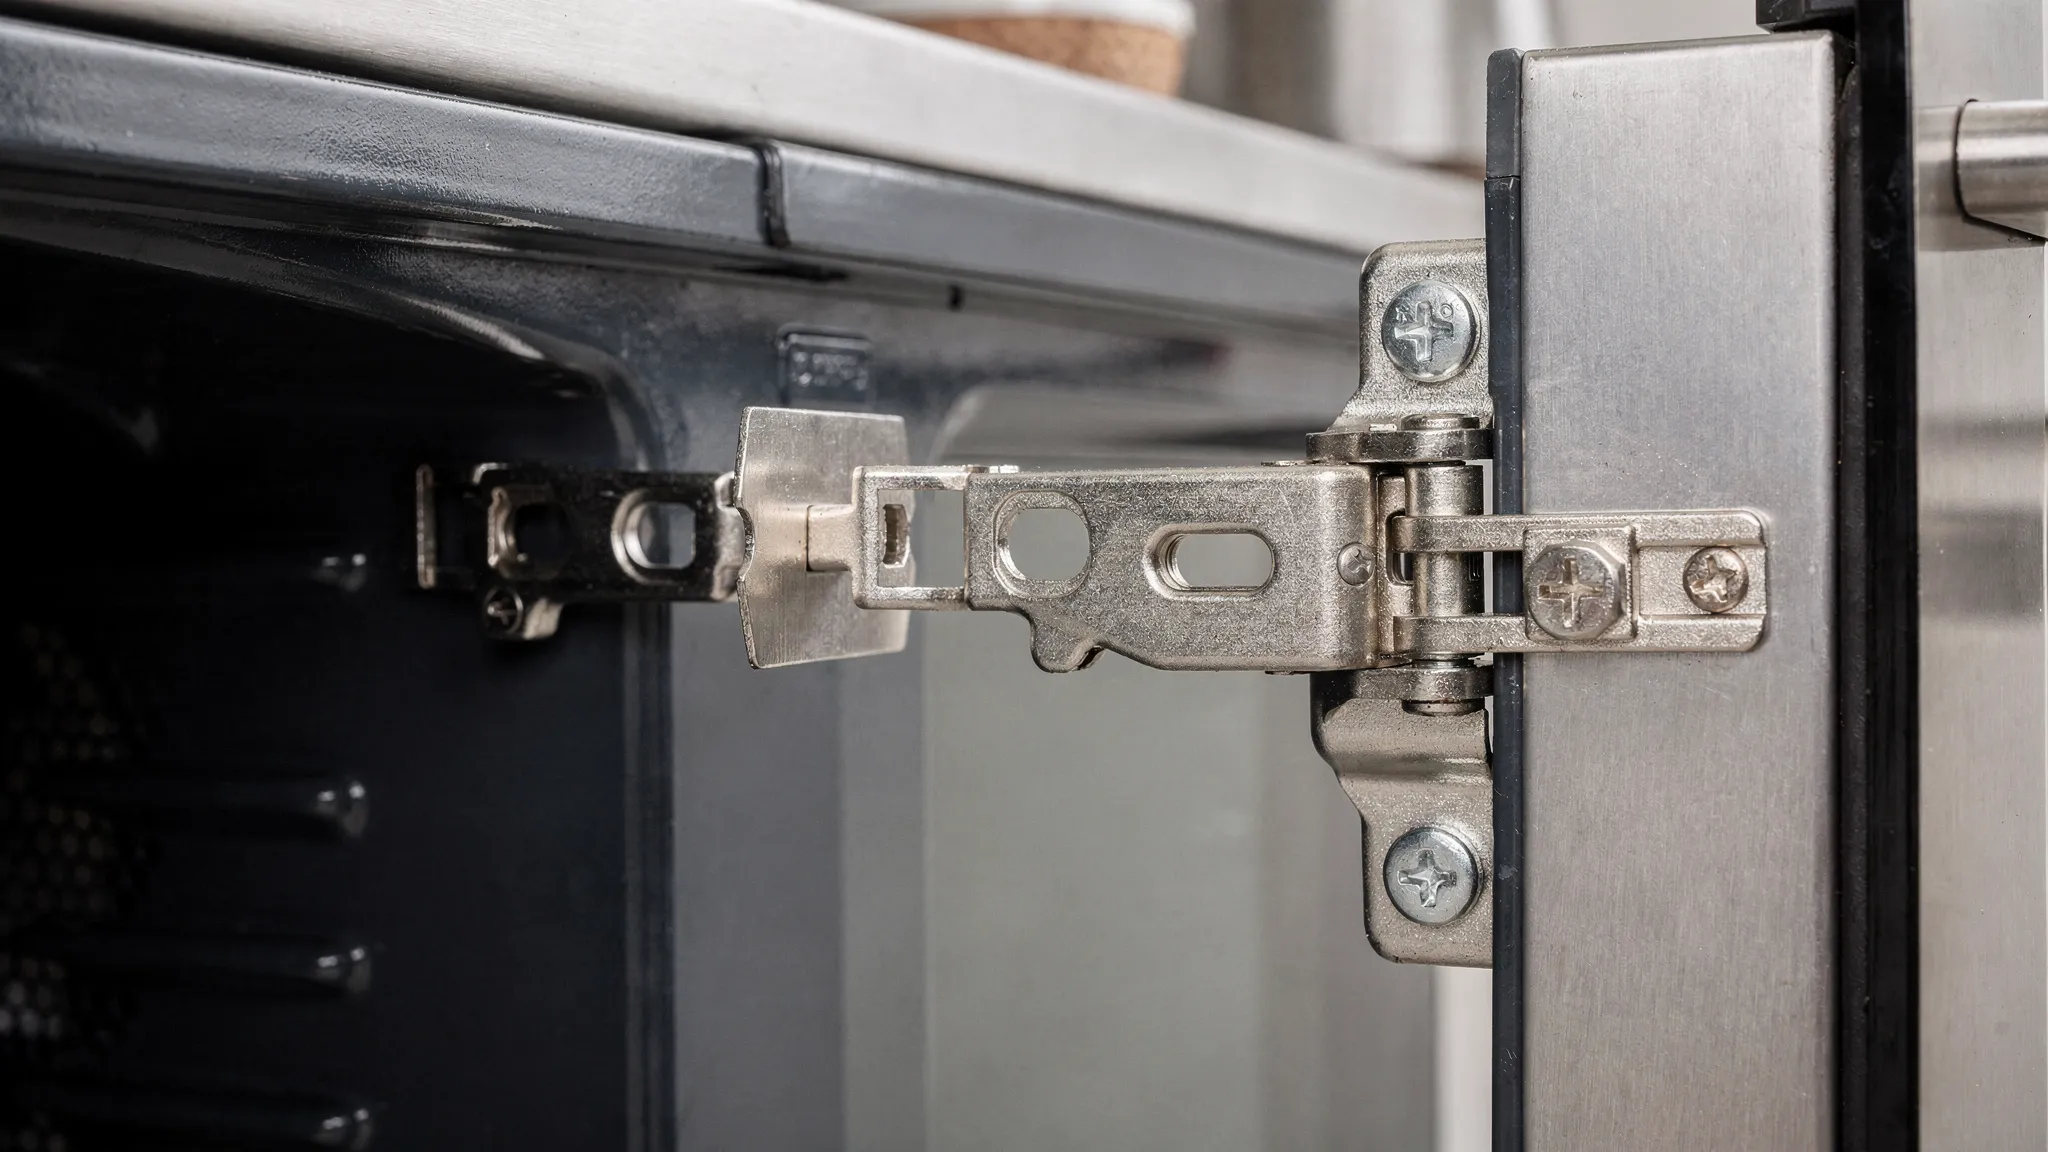
Step 3: Inspect hinges, receivers, and springs (what to look for)
With the door off, you can usually see what’s wrong much more clearly.
A. Worn or bent hinge arms
Check each hinge arm for:
- Visible bending or twisting
- Cracks, severe rust, or discoloration from overheating
- Excessive looseness in the hinge joint
If one hinge looks different than the other, replace hinges as a pair whenever possible. Replacing only one can leave uneven tension and cause the door to drift out of alignment again.
B. Loose or shifted hinge receivers (the slots in the oven frame)
Look at the oven-side hinge receiver area:
- Are mounting screws loose?
- Is the receiver bracket visibly shifted or distorted?
- Are the slots widened or torn?
If the receiver is loose, tightening may solve the alignment issue. If the metal is damaged, the fix can be more involved (and is often best handled by a pro).
C. Spring tension issues (model-dependent)
Some designs incorporate spring tension within the hinge assembly, while others use separate springs or cables (more common in certain door types and older designs). Signs of spring-related problems include:
- Door drops quickly with little resistance
- Door feels “weightless” compared to normal
- A visible broken spring or disconnected cable (if your model uses one)
If a spring or cable is broken, do not run the oven until it’s repaired. The door can slam unexpectedly, stressing the glass and hinges.
Step 4: Fixes you can do at home
Fix 1: Reseat the hinges and reinstall the door correctly
If the hinges look intact, start with the simplest, most common solution: reseating.
- Confirm both hinge arms are fully extended and in the same position.
- Align both hinge arms with the receiver slots.
- Slide the door back in evenly, keeping both sides level.
- Open the door fully.
- Flip the hinge locks back to the unlocked position.
- Close the door and check the gap and feel.
If the door now closes smoothly and looks even, the issue was likely a hinge that was slightly out of the slot.
Fix 2: Tighten and square the hinge receivers
If you saw a loose receiver bracket:
- With the door removed, snug the receiver mounting screws.
- Visually confirm the left and right receivers sit at the same height and angle.
- Reinstall the door and test closure.
Do not force the bracket to “bend back” if it looks distorted. If the metal is deformed, tightening alone may not hold, and forcing can crack enamel or worsen the distortion.
Fix 3: Replace worn hinges (common DIY repair)
Hinge replacement is straightforward on many models, but the steps depend heavily on how your oven is built.
- Identify your oven’s model number and order the correct hinge kit.
- Remove the oven door (as above).
- Remove the old hinge assembly from the door (or from the oven frame, depending on design).
- Install the new hinges, matching left and right correctly.
- Reinstall the door and test.
If your oven is a wall oven, hinge replacement can still be DIY, but access may be tighter and the door heavier. If you are unsure, it is safer to schedule professional service.
Step 5: Alignment check after reassembly
After any hinge or receiver work, do a basic alignment and function check.
- Check the gap around the door: it should be reasonably even on both sides.
- Open the door halfway and release gently: it should not drop abruptly or spring upward.
- Close the door and confirm it stays closed without you pushing on it.
- Run a short, low-temperature test (for example 300°F for 10 to 15 minutes) and watch for obvious heat leakage at one corner.
If the door still looks uneven after reseating and tightening, you likely have either a worn hinge (even if it “looks okay”) or a distorted receiver area.
When it’s time to call a professional (and why)
DIY is great for reseating a hinge or tightening a bracket, but some situations are better left to a trained technician.
Call for professional Phoenix appliance repair services if:
- The hinge receiver area is cracked, torn, or no longer holds screws tightly.
- The door glass is cracked, loose, or the door feels “racked” (twisted) even with new hinges.
- Your oven has a stuck self-clean latch or lock mechanism that affects door closure.
- A spring or cable is broken and requires disassembly you are not comfortable doing.
- You have a wall oven and the door removal feels unsafe to do solo.
Kitchen safety matters. The National Fire Protection Association notes that cooking equipment is a leading cause of home fires and home fire injuries, so any oven that does not close properly or behaves unpredictably deserves prompt attention. See NFPA cooking safety guidance for prevention tips.
If you’re dealing with a time-sensitive issue (for example, the door won’t stay shut and you need to cook safely), it may be worth booking emergency appliance repair in Phoenix.
Preventing hinge and alignment problems
Most hinge wear is normal over time, but you can slow it down.
- Avoid resting heavy cookware on the open door.
- Do not let kids stand or sit on the door.
- Close the door gently (slamming accelerates hinge wear).
- After deep-cleaning, make sure hinge locks are fully reset and the door is seated evenly.
- If you clean between door glass panels (on models that allow it), follow the manual so screws and trim pieces go back without twisting the door.
Frequently Asked Questions
Why is my oven door not closing all the way after I removed it? Most often, one hinge arm is not fully seated in the receiver slot, or the hinge locks were not returned to the normal position. Remove and reinstall the door carefully and confirm both hinges slide in evenly.
Can I use the oven if the door is misaligned? It depends on severity. If the door won’t stay shut, drops unexpectedly, or you notice significant heat leaking from a corner, it’s safer to stop using it until it’s fixed. A poor seal can also affect cooking performance.
How do I tell if it’s the hinge or the door gasket? Hinge issues usually show up as sagging, tilting, or uneven door movement. Gasket issues often show up as heat leaking evenly around the perimeter, longer cook times, or a failed “paper test” at the edge. If you suspect the gasket, see this guide: How to Repair an Oven Door Seal in Phoenix.
Do I need to replace both oven door hinges? In many cases, yes. Hinges wear as a set. Replacing one hinge can leave uneven tension that makes the door drift or bind.
What information should I have ready before calling an oven repair tech in Phoenix? Your oven’s brand, model number, a clear description of the symptom (tilt, drop, won’t stay shut), and whether the door was recently removed. Photos of the hinge area can also help.
Need help getting your oven door closing like new?
If you’ve reseated the door and checked the receivers but the door still sags, pops open, or drops suddenly, a worn hinge or damaged mounting area is likely. PHX Appliance Fix Blog shares practical repair guidance, and when you’re ready to schedule local service, you can start here: appliance repair Phoenix resources. For more on common oven fixes and what technicians typically repair, see: Can Ovens Be Repaired? Phoenix Technicians Explain Common Fixes.