When your range hood lights won’t turn on, the cause is usually one of three things: a burned-out bulb, a failed switch or a wiring problem inside the hood. The trick is figuring out which one you have without creating a shock risk, damaging the hood or replacing parts you did not need.
For Phoenix homeowners, range hood problems often show up after heavy cooking, deep cleaning or a summer power fluctuation. Grease, heat and dust can all make a small lighting issue look more mysterious than it is. Start with the simple checks, then stop before any test that requires live voltage or disassembling wiring beyond your comfort level.
First, check whether it is only the range hood lights
Before opening the light cover, test the rest of the hood. Does the exhaust fan run at every speed? Do the buttons beep or respond? Is the clock, display or indicator light still working if your model has one?
This first observation narrows the problem quickly. If the fan works but the lights do not, the issue is likely limited to the bulbs, sockets, light switch, LED driver or lighting circuit. If nothing on the hood works, you may be dealing with a tripped breaker, a dead outlet, a loose power connection or a failed control board.
Also check nearby kitchen outlets and appliances. Some range hoods plug into an outlet hidden inside the cabinet above the stove, while others are hardwired. If other devices on the same circuit are dead, the hood may not be the real problem. Reset the breaker once, but if it trips again, stop and call a qualified technician or electrician.
Safety steps before troubleshooting range hood lights won’t turn on
Range hoods sit above heat, steam and grease, which makes safety more important than speed. Turn the hood off and let nearby cooktop surfaces cool completely. If the hood plugs into an outlet, unplug it. If it is hardwired, shut off the breaker that supplies the hood before removing covers or touching sockets.
Do not test wires by touching them, and do not work inside the hood with power on unless you are trained to do so. The Electrical Safety Foundation International recommends treating electrical repairs seriously because household current can cause severe injury.
You should also wear gloves when handling halogen bulbs. Oils from your skin can shorten the life of some halogen lamps, and old bulbs can crack when removed. If the glass lens is greasy, clean around it gently before twisting or unclipping it so debris does not fall into the socket.
Bulb problems: the most common and easiest fix
A burned-out bulb is still the simplest explanation, especially if only one side of the hood is dark. Many range hoods use incandescent, halogen or LED bulbs, and each type has its own failure pattern.
Incandescent and halogen bulbs often fail suddenly. LEDs can flicker, dim or fail if the bulb is not compatible with the hood’s dimmer or control board. Some hoods require appliance-rated bulbs that tolerate heat better than standard household bulbs.
How to check the bulb correctly
Remove the old bulb only after power is off. Look for a broken filament, dark glass, a loose base or signs of heat damage. Then check the label printed on the bulb or the range hood’s manual for the correct wattage, voltage, base style and bulb type.
Do not install a higher-wattage bulb to make the cooking surface brighter. Too much wattage can overheat the socket, melt plastic covers or damage the control. If the hood label says 40 watts maximum, stay at or below that rating.
A good test is to move a working bulb from the other side of the hood into the dead socket, if your hood has two identical lights. If the working bulb lights in the suspect socket, the old bulb was bad. If the working bulb stays dark in that socket, the problem is farther down the line.
Common range hood bulb types
| Bulb type | Common base examples | Typical clue when faulty | DIY note |
|---|---|---|---|
| Incandescent | E17, E26 | Bulb is dark or filament is broken | Replace with the same wattage or lower |
| Halogen | GU10, G4, MR16 | Sudden failure or flickering before failure | Avoid touching glass with bare fingers |
| LED | GU10, E26, integrated LED module | Flicker, dim light or no response | Confirm compatibility before replacing |
| Integrated LED strip or module | Model-specific connector | All LEDs in the module are out | Often requires model-specific parts |
If your hood uses a sealed LED module instead of a screw-in bulb, replacement may involve removing the light assembly and disconnecting a small harness. That is still manageable on some models, but it depends heavily on the design.
Socket issues: when the bulb is good but still will not light
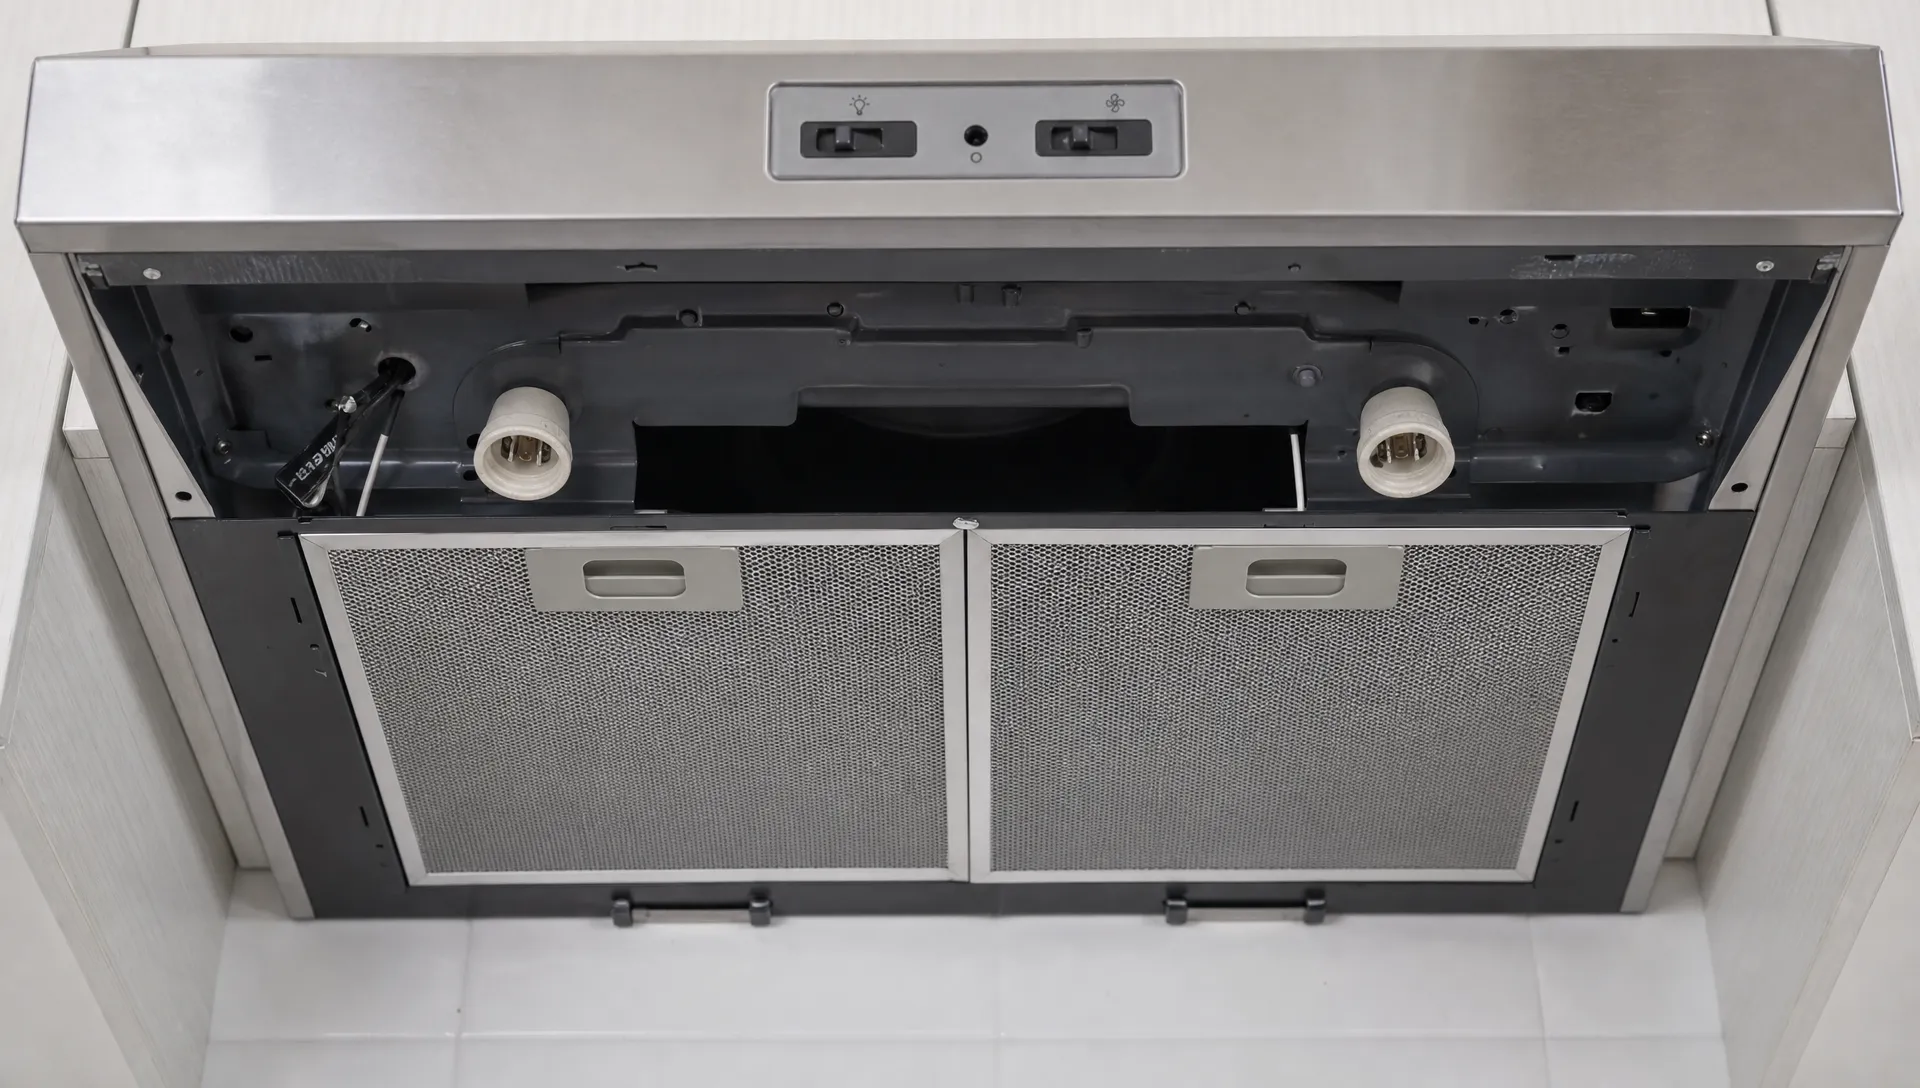
If a known-good bulb does not work in one socket, inspect the socket with the power off. Look for burn marks, corrosion, looseness, broken ceramic, melted plastic or a center contact that appears flattened.
Grease vapor can collect near the light area over time. In Phoenix, dust can mix with that grease and create a sticky film around lenses and sockets, especially if the filters are overdue for cleaning. That buildup usually does not stop electricity by itself, but it can trap heat and accelerate wear.
Do not scrape inside a socket with a metal tool. If the center contact is bent, the socket is burned or the bulb base feels loose, replacing the socket is safer than trying to force the connection back into shape. A bad socket can also cause repeated bulb failures, which is a sign the bulb was not the only issue.
Switch problems: small part, big symptom
If both lights are out but the fan still works, the light switch becomes a strong suspect. On basic range hoods, this may be a rocker switch or slide switch. On newer models, the “switch” may be part of an electronic control panel, touch membrane or small circuit board.
Mechanical switches wear out from heat, grease and repeated use. You may notice the light button feels loose, sticks, fails intermittently or only works when pressed at an angle. That behavior points toward a switch or control interface rather than the bulbs.
How to tell if the switch is likely bad
A light switch issue often has a pattern. The bulbs may flicker when you touch the switch, both lights may fail at once or the fan may work normally while the lighting circuit stays dead. If the switch feels physically damaged, replacement is usually more practical than cleaning it.
Some homeowners try to spray cleaners into sticky switches, but that can push moisture and residue into the control area. Use a mild degreaser on exterior surfaces only, applied to a cloth rather than sprayed directly into buttons or seams.
If your hood has a touch control panel, the repair may involve a control board, ribbon cable or user interface assembly. These parts are model-specific, so the model number matters. You can usually find it under the hood, behind the grease filters, on the side wall of the hood body or inside the upper cabinet.
Wiring problems: when to stop DIY troubleshooting
Wiring is the category where DIY range hood repair should become cautious. A loose connector inside the hood, a damaged wire near the light socket, a failed LED driver or a bad control board can all cause the range hood lights won’t turn on problem. The symptoms may look similar, but the repair path is different.
A wiring problem is more likely if the lights flicker when the hood vibrates, if both bulbs fail at the same time after a pop or spark, or if the problem started after the hood was removed, remodeled around or heavily cleaned. Rodent damage is less common in kitchens but still possible in some attic-routed vent or cabinet areas.
Never bypass a switch, fuse or thermal device to “test” the hood. Those components are there to reduce fire and shock risk. The National Fire Protection Association’s cooking safety guidance is a good reminder that anything above the cooking surface should be kept clean and safe, not improvised.
LED drivers, transformers and control boards
Many LED range hoods do not send household voltage directly to the light module. Instead, they use a driver or transformer that converts power for the LEDs. When that driver fails, the LEDs may all go dark even if the bulbs or modules are fine.
Control boards can fail too, especially after a surge, moisture intrusion or repeated overheating. A failed board may affect only the lights or may also affect fan speeds, displays and buttons. Because these parts can be expensive and model-specific, a professional diagnosis can prevent replacing the wrong component.
Quick diagnosis table: bulb, switch or wiring?
Use the pattern of failure to decide what to check next. This table does not replace electrical testing, but it helps you avoid random part swapping.
| Symptom | Most likely cause | Safe homeowner check | When to call for help |
|---|---|---|---|
| One light is out, the other works | Burned-out bulb or bad socket | Swap in a known-good matching bulb | Socket is burned, loose or melted |
| Both lights are out, fan works | Light switch, control panel, LED driver or shared lighting wire | Confirm bulbs are correct and power is off before inspection | Switch feels damaged or bulbs test good |
| Lights flicker when fan runs | Loose socket, loose connector or vibration-sensitive wiring | Check bulb fit with power off | Flicker continues with known-good bulbs |
| Nothing on hood works | No power, breaker, outlet, plug or main control issue | Check breaker and nearby outlets | Breaker trips again or hood is hardwired |
| New bulbs fail quickly | Wrong wattage, heat buildup, bad socket or voltage issue | Confirm rating and clean filters | Repeated failures after correct bulbs |
If you are also having trouble with burners below the hood, treat that as a separate appliance issue. For gas cooktop ignition problems, the PHX Appliance Fix Blog has a helpful guide to stovetop burners that won’t ignite.
Do not overlook grease filters and airflow
Dirty filters usually do not directly prevent range hood lights from turning on, but they can contribute to overheating. When grease filters are clogged, heat and cooking vapor linger around the light assembly longer. Over time, that can shorten bulb life, discolor lenses and stress sockets.
Most metal mesh filters can be removed and cleaned with hot water and dish soap or a degreaser approved by the manufacturer. Charcoal filters, common in ductless recirculating hoods, are usually replaced rather than washed. Check your owner’s manual for the right interval.
Cleaning the lens matters too. A cloudy or grease-coated lens can make a working bulb look weak or dead. Let the lens cool, remove it carefully and wash it by hand if the manual allows it. Make sure it is completely dry before reinstalling.
When Phoenix homeowners should call a technician
Call a technician if the hood is hardwired and you cannot safely shut off and verify power, if you see burned wiring, if the breaker trips or if the repair points to a switch, LED driver or control board. These are not good areas for guesswork.
Professional help also makes sense when the hood is built into custom cabinetry or paired with an expensive range. Removing the wrong screws can loosen the hood from its mount, damage trim or create a venting problem. A short service visit can be cheaper than replacing a damaged control panel or cracked glass lens.
If you are comparing local options, look for clear scheduling, experience with your hood type and a willingness to explain whether the issue is a bulb, control or wiring fault. You can also start with local Phoenix appliance repair services if the problem is beyond basic troubleshooting.
What to have ready before you call
A little preparation helps the technician diagnose the range hood lights won’t turn on issue faster. Find the brand and model number, write down when the problem started and note whether the fan still works. If you recently replaced bulbs, keep the packaging or take a photo of the bulb label.
Also mention any recent events that could matter, such as a deep cleaning, kitchen remodel, power outage, breaker trip or water leak from an upper cabinet. These details can point directly to a connector, control board or power supply problem.
Avoid taking the hood apart before service if you are unsure how it goes back together. Missing screws, disconnected harnesses and mixed-up parts can make a simple lighting repair harder to verify.
Frequently Asked Questions
Why did both range hood lights go out at the same time? Both lights failing together often points to a light switch, control board, LED driver, shared wiring connection or loss of power to the lighting circuit. It can still be two bad bulbs, but that is less likely if they failed at exactly the same moment.
Can I use any LED bulb in my range hood? No. Use a bulb that matches the hood’s wattage, voltage, base type and temperature requirements. Some range hoods are not compatible with standard household LED bulbs, especially if they use dimming or multi-level light controls.
Is it safe to keep using the fan if the hood lights do not work? It may be safe if the fan operates normally and there are no burning smells, sparks, tripped breakers or visible damage. If the light failure is tied to electrical symptoms, stop using the hood until it is inspected.
Why do my range hood bulbs burn out so fast? Fast bulb failure can come from using the wrong wattage, poor-quality bulbs, excessive heat, clogged filters, a loose socket or a voltage problem. If correct bulbs keep failing, the socket or wiring should be checked.
Should I repair or replace an older range hood? Repair is often worthwhile for a simple bulb, socket or switch problem. Replacement may make more sense if the hood has a failed control board, damaged housing, poor ventilation or parts that are no longer available.
A range hood light failure is usually fixable, but the right repair depends on the evidence. Start with power, bulbs and visible socket condition. If the basics check out and the range hood lights won’t turn on, the safest next step is a proper diagnosis of the switch, wiring and control components before more parts are replaced.